
How Your New Account Makes Booking Painless
No more re-entering your card or trying to remember when you were last helped — creating a free account handles both.
Booking a session used to mean typing in your card number every time and trying to remember when your last visit was. Creating a free account on the site now takes care of both — no new app, nothing extra to maintain.
What you get
Stored payment, saved once. Add a card to your account and future bookings skip re-entering it.
Your order history in one place. See every past booking at a glance under Orders.
Faster rebooking. Once your info's on file, booking the next session takes under a minute.
How to set it up
Click "Login" in the top navigation, next to the "Schedule Support" button.

2. Click "Create account" on the sign-in page.
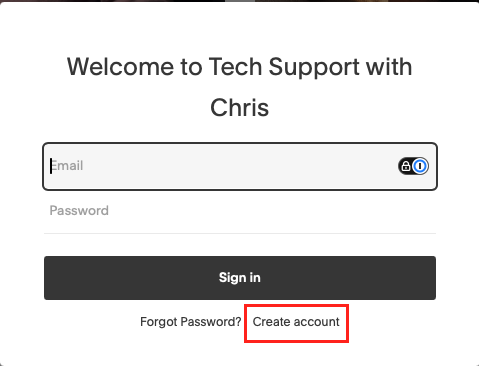
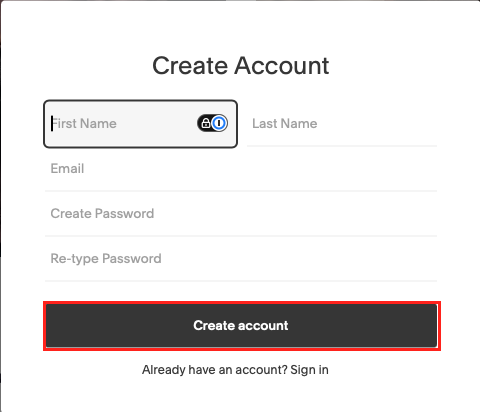
3. Fill in your name, email, and a password, then click "Create account."
4. Confirm your account by clicking the link in the verification email. Until you do, you'll see a "not verified yet" banner on your account page with an option to resend it. Make sure to check your Junk, Spam, Promotions or other folders in case your email provider filters these kinds of messages.
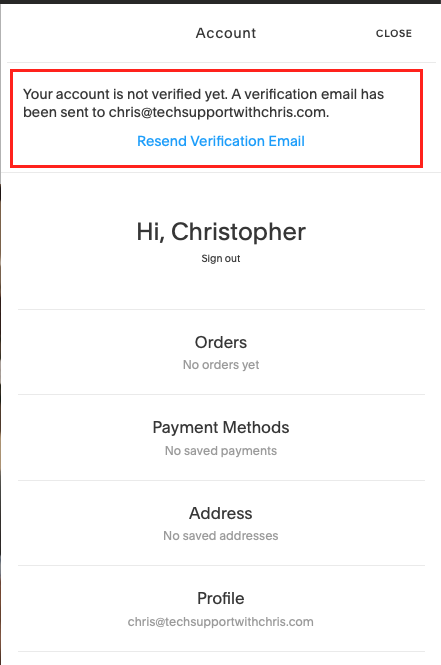
5. Add a payment method. From your account page, click "Payment Methods" and save a card so future bookings skip re-entering it.
6. Add your address. Click "Address" on the same page to keep it on file.
That's it — nothing extra to download or maintain. It just makes booking and paying next time that much easier.
